
A couple of days ago, a friend of mine told me that in her son’s school, the teacher has a problem during the online class. A couple of students kept muting and even removing other students from the online class meeting. So, I just wanted to share, that there is a solution for this, and it is pretty simple.
When you schedule the class, you need to open the meeting and click on the meeting options:
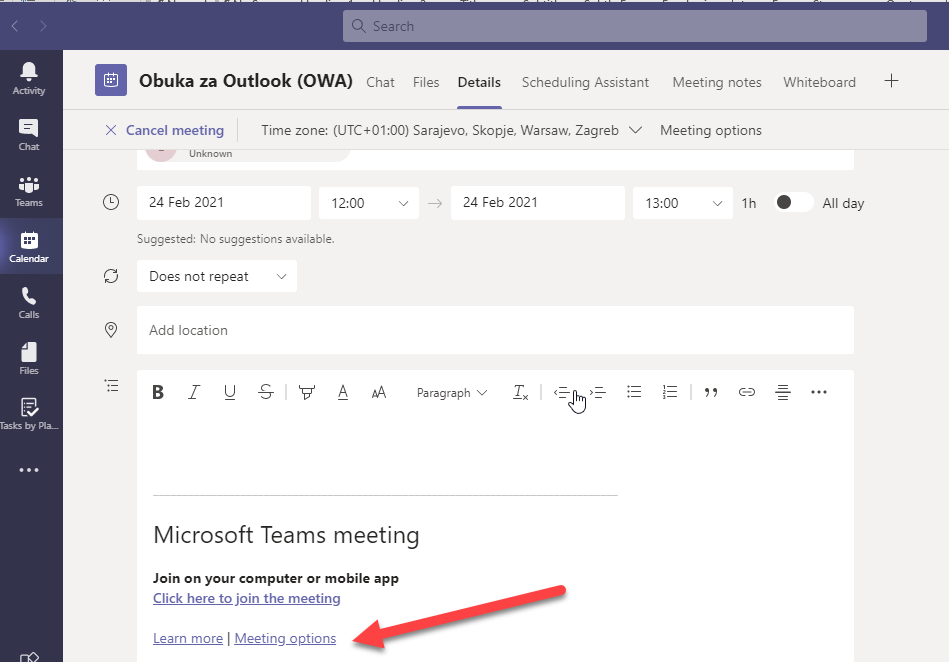
Here you can see there are a couple of options to adapt, according to your needs, and now we will cover two of them: Lobby and presenting
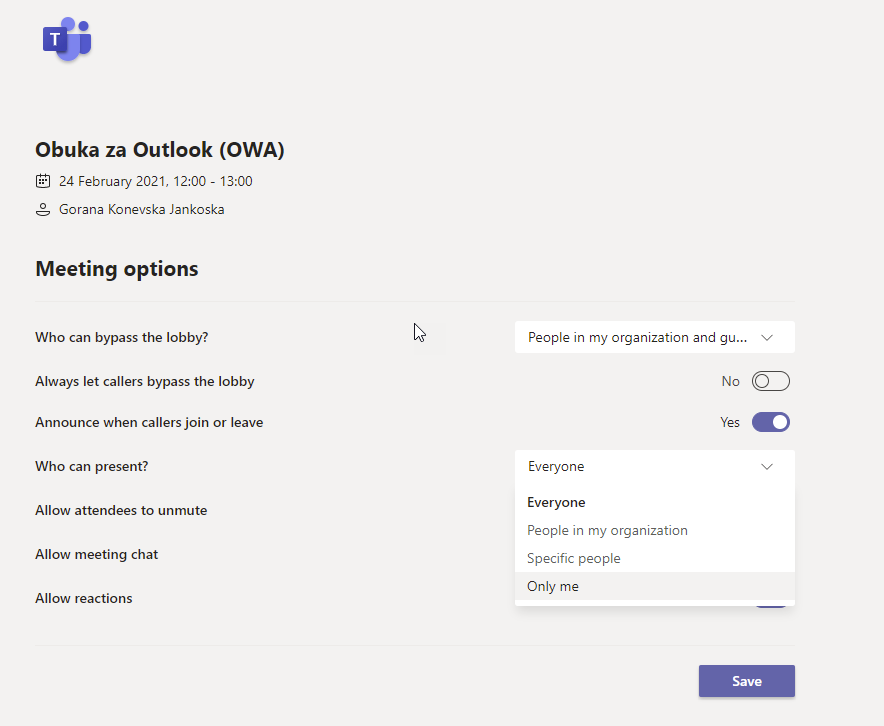
Lobby: who can bypass the Lobby?
The Lobby is a place where the invitees are going to wait until you allow the access. Here you can allow everybody to join without leaving them wait in the Lobby, or you can just allow bypassing the Lobby to only attendees from your organization (+trusted organizations and guests). You can also choose to allow bypass the Lobby only to yourself as an organizer, and then, everyone else is going to need to wait in the Lobby to manually be added in the meeting. When organizing a class, maybe it would be good to leave this option in the People in my organization and guests selection. Students are a part of your organization, and if it is a larger class, you do not want to end up taking 5-10 minutes of the class time in order to manually approving access to every single student.
Who can present?
In this section you can choose to allow everyone to have a presenter role, just a people within your Microsoft 365 organisational environment, just a specific people you will manually choose or you can make the most restrictive option: only me. With only me option, the other attendees will now have some functionalities as: kick out someone from the meeting or mute other people. So, in this case of the class lecturing, it is recommended that the teacher have chosen only me option.
What if you have already organized the meeting/class, and it has started but you haven’t done this setting? No problem, you can do it right from the Microsoft Teams meeting. You will need to choose the three dots for more options as shown on the picture below, and then choose Meeting options. Here, you can see that the same options are available for you to set up.
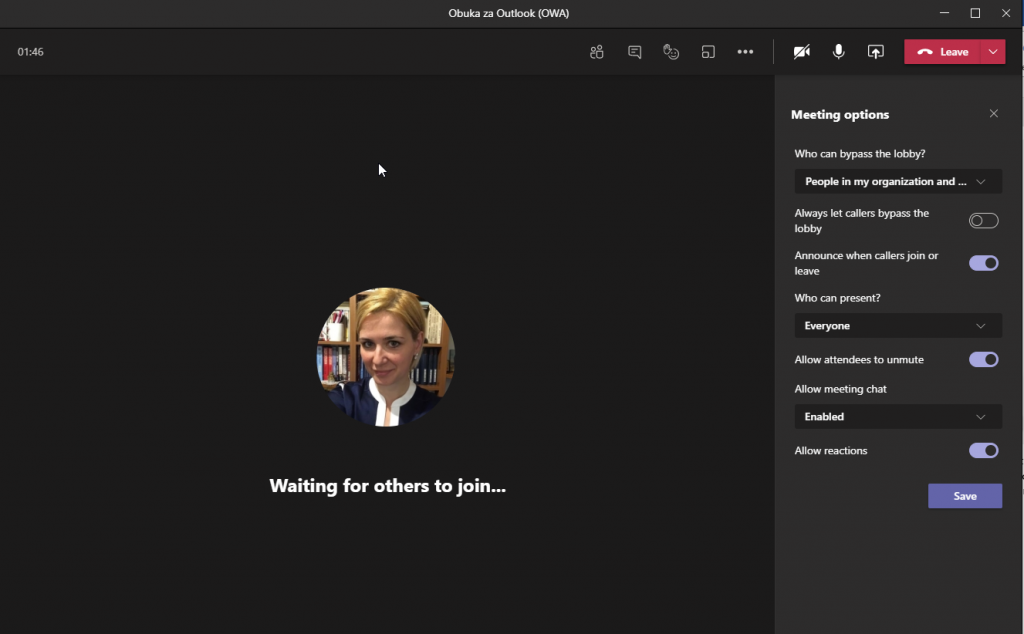
If you have a lecture or presentation you want to held without anyone being ableto unmute and ask questions directly, then you and disable that option here as well, when you toogle the Allow attendees to unmute to off. In this case you may instruct the attendees to raise a hand or type in a chat for any question.
Easy, right? It goes just with a few clicks, but they make a lot of difference 🙂
More on a roles during a Microsoft Teams meetings you may read here.

Be the first to comment